1/8'' 3-Way 12V DC Electric Solenoid Valve
Availability: In Stock
Technical Details
SKU
231Y-3-12VDC
Position
Normally Closed
Port Size
1/8" Female NPT
Voltage
12V DC
Body Material
Brass
Components
Stainless Steel
Seal Material
NBR
Orifice Size
1.5 mm
Temp Range
25 to 195° F / -5 to 90°C
Pressure Range
0 - 115 PSI
Flow Rate
Cv 0.09 (Appx 0.7 gpm @ 60 psi)
Power
13 Watts
Coil Connection
DIN 43650A
Response Time
Fast Acting (Less than one second)
Duty Cycle
100% Duty at Rated Ambient Temperature
*Suitable Media
Water – Air - Fuel - *Etc
Weight
14.5 oz
Height
3.70"
Length
1.68" port to port (2.65" total)
Width
1.12"
Product Overview
Model 231Y-3 of our 3 Way valve line is a direct acting valve with a normally closed operating position. This specific valve has three ports in which media flows. While the valve is energized, the exhaust port is closed and media travels from the inlet port through the outlet port. While the valve is de-energized, the inlet port is closed and media travels from the outlet port through the exhaust port. It works across various media such as water, air, vacuum or other low viscosity fluids.
The port size is 1/8” inch female NPT threaded. The orifice size is 1.5mm and the CV value is 0.21. It can withstand pressure up to 115 psi (8 bar) and temperatures as low as -5 C and as high as 90 C. The seal material is NBR (Buna-N) or Nitrile Butadiene Rubber.

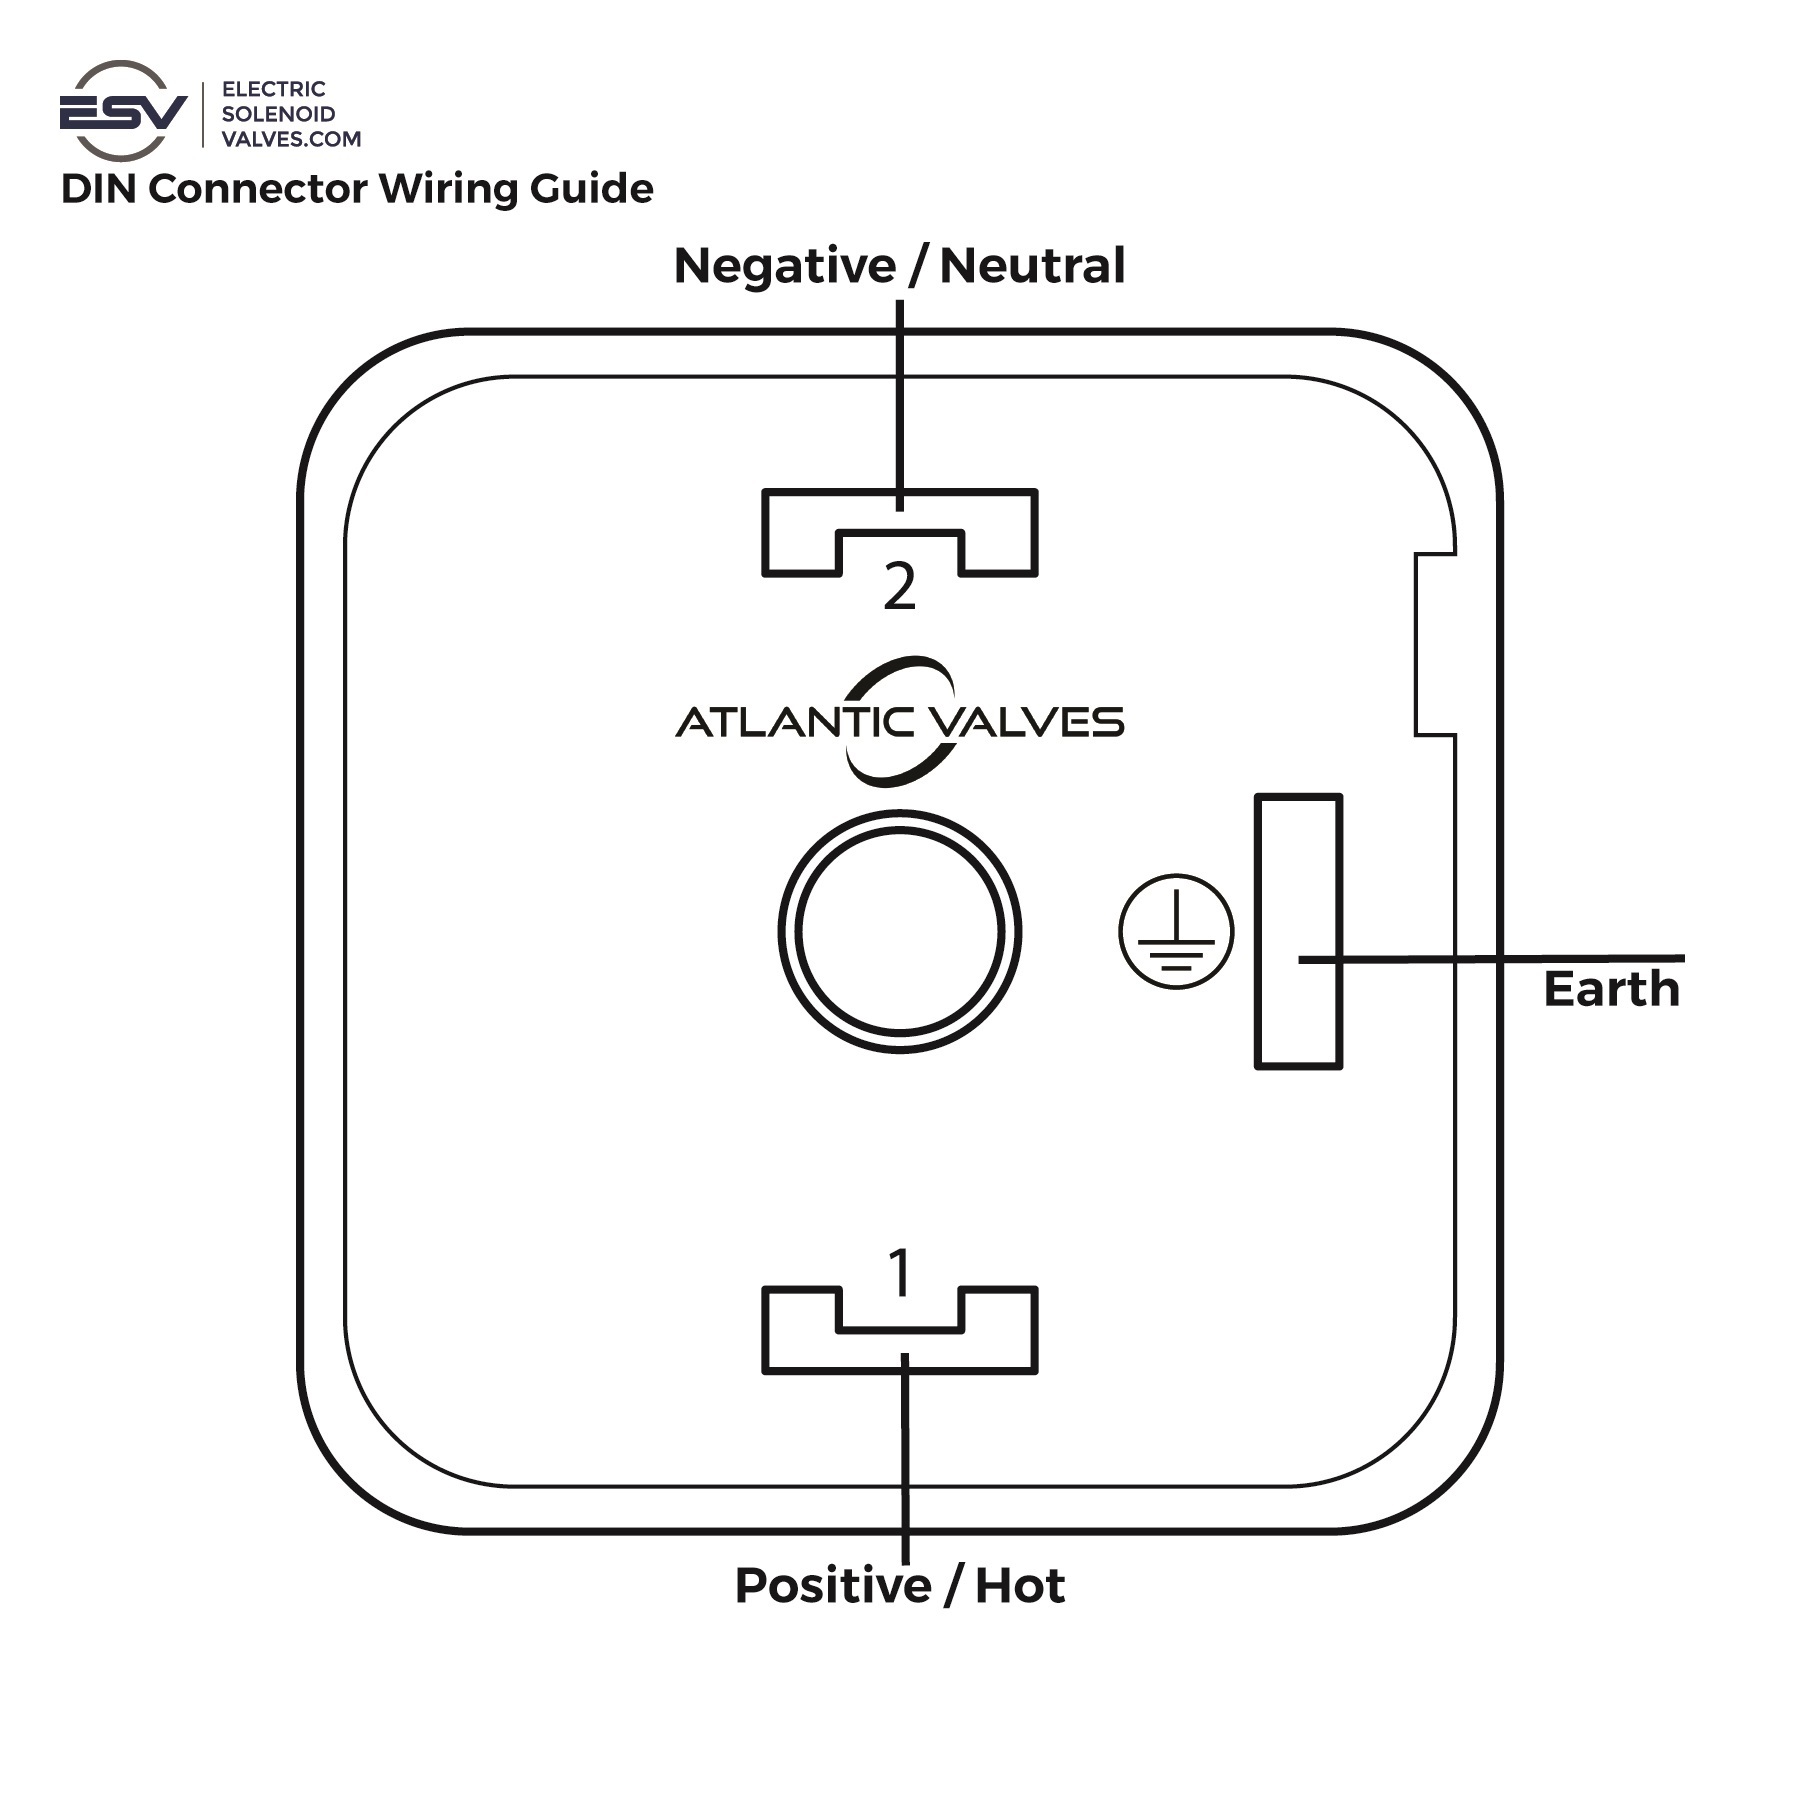
Wiring Instructions:
- Loosen and remove the Phillips-head screw securing the DIN connector to the coil.
- Detach the DIN connector from the coil.
- Open the DIN connector housing by prying at the small slot located in the bottom corner next to the Earth terminal.
- Inside the housing, locate the screw terminals:
- Terminal 1: Connect the hot or positive wire.
- Terminal 2: Connect the neutral or negative wire.
- Earth Terminal (for AC voltages only): Connect the ground or Earth wire.
- Ensure all screw terminals are securely tightened for a reliable connection.
- Reassemble the DIN connector by reversing the steps above.