
Posted by Electric Solenoid Valves on Dec 18th 2025
How To Clean Plastic Valves The Right Way For Long Service Life
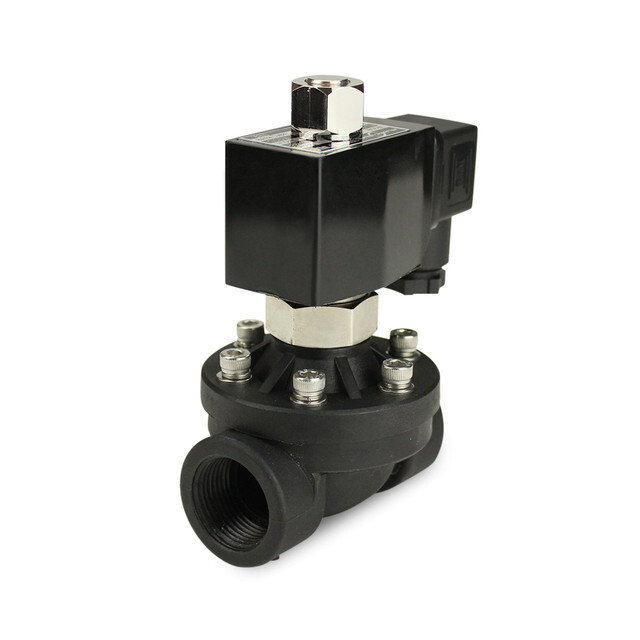
Plastic valves are often chosen because they are corrosion-resistant, lightweight, and compatible with a wide range of water and light-chemical applications. That can make them feel like a “low maintenance” option, but they are not maintenance-free.
In fact, plastic valves can be more difficult to maintain if they are pushed outside their operating range. They are more sensitive to temperature limits, over-torquing, and installation stress, and the body can deform if fittings are forced or misaligned.
If you never clean your plastic solenoid valves or UPVC ball valves, debris and scale can still cause sticking, leakage, and premature failure. The good news is that basic cleaning, done correctly, can extend service life without damaging the plastics or seals. This guide walks through safe, practical cleaning steps so you can keep valves running instead of replacing them.
1. Know what your plastic valve is made of
Before you reach for a cleaner, you need to know what you are cleaning.
On ElectricSolenoidValves.com, typical plastic valve body and seal materials include:
- PP (Polypropylene) – Generally good chemical resistance; limited temperature application
- POM (polyoxymethylene) – Dimensionally stable but prone to environmental stress cracking when exposed to chlorinated water or alcohols.
- Nylon 66 (PA66) – Strong, but absorbs moisture, which can change diaphragm compression over time
- EPDM – Excellent compatibility with water and mild acids; not compatible with hydrocarbons.
If your application involves drinking water, wetted components must comply with:
- NSF / ANSI 61 – Drinking water system components
- NSF / ANSI 372 – Lead content requirements
Understanding these materials and regulatory constraints ensures you choose cleaners that won’t damage the valve.
Key point: You cannot treat a plastic valve like a metal one. A cleaner that is safe for brass or stainless may damage plastic or EPDM over time.
2. What actually builds up inside plastic valves
Common issues you are trying to remove:
- Fine debris and sediment from water lines
- Mineral scale from hard water
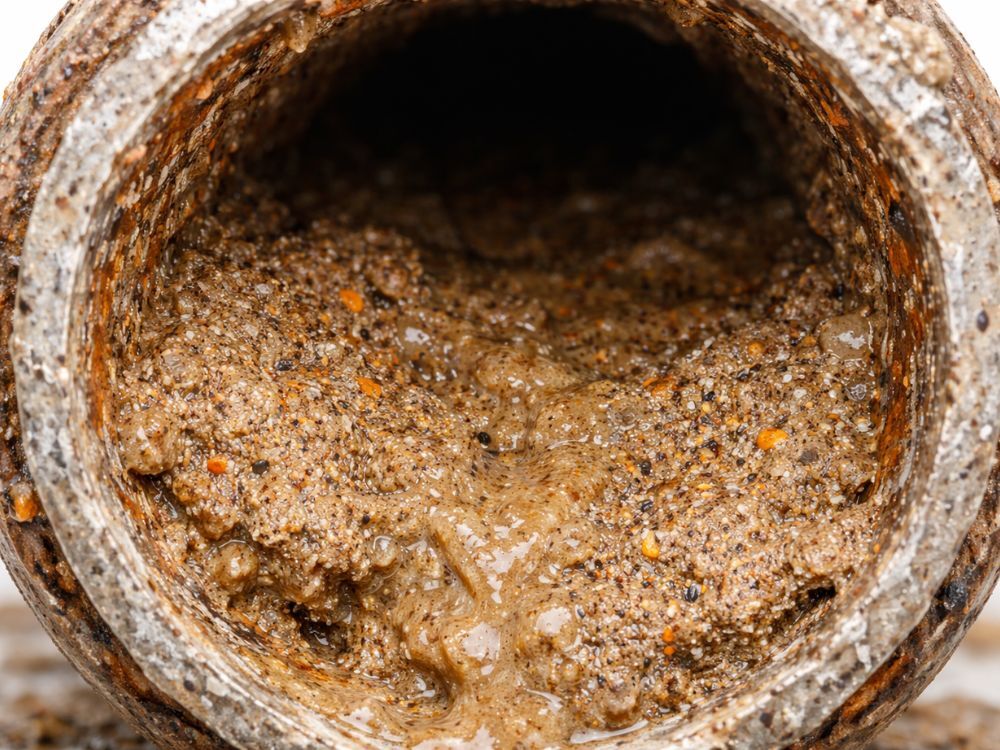
- Biofilm and organic slime in low-flow or intermittent service
- Residual chemicals that crystallize as they dry
If you ignore this:
- Pilot ports and orifices clog, causing a solenoid valve to stick open or closed
- Balls in UPVC valves can become stiff to turn
- Plastic seats may get scratched by trapped grit, which leads to Leakage failures
Over time, the following engineering failure modes also occur:
- Diaphragm compression set – resulting to reduced sealing capability
- O-ring extrusion, under pressure spikes.
- Plastic creep from long-term stress
- Cold flow deformation of the ball and seats.
- Plunger tube denting leading to solenoid sticking
Routine cleaning clears these failure modes and significantly reduces premature valve failure.
3. Safe cleaners vs products to avoid
Recommended cleaners for most ESV plastic valves
|
Cleaner type |
Use Case |
Notes |
|
Mild dish detergent in warm water (<40°C) |
General dirt, biofilm, light oils |
Safe for PP, UPVC, Nylon, and EPDM |
|
Dilute white vinegar solution |
Light mineral scale and hard water deposits |
Keep soak times short (<20 min). |
|
Clean water flush only |
New valves with machining dust or light debris |
Avoid hot water above plastic temperature ratings. |
Cleaners and methods to avoid
- Undiluted bleach or strong oxidizers on EPDM without checking compatibility
Note: Mild exposure is acceptable under NSF 61 conditions - Scouring pads, steel wool, or abrasive brushes that can scratch plastic seats
- High-pressure air or steam directly on plastic seats and seals
If you are not sure about a cleaner or chemical, check the ESV compatibility database or the specific valve’s datasheet before using it.
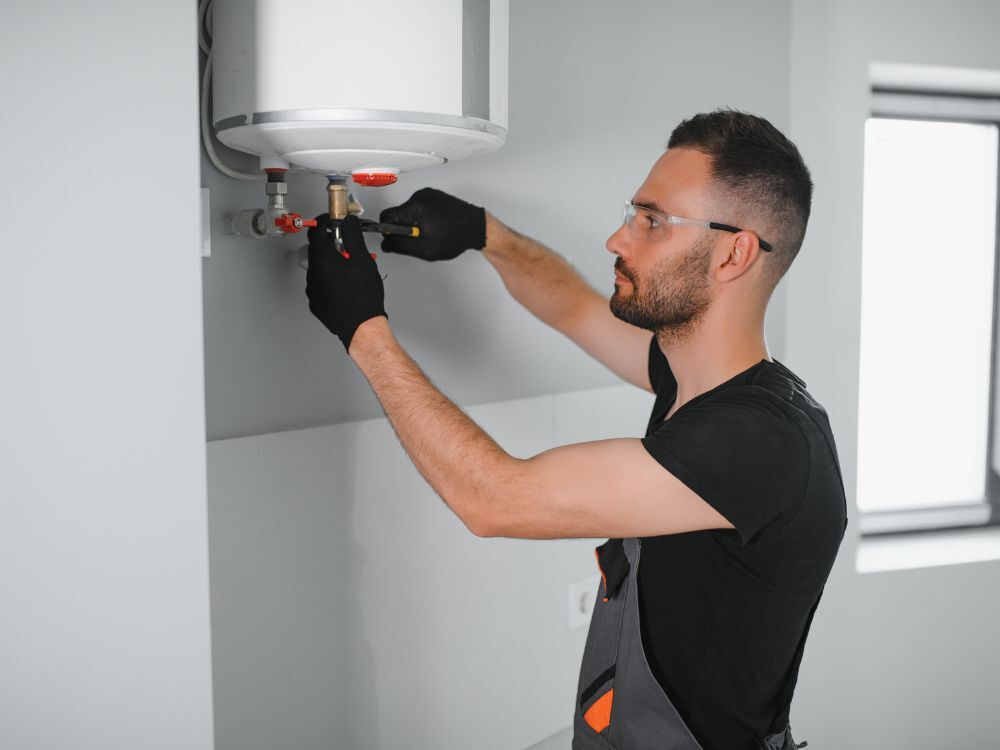
4. Prep and safety before you clean
Before handling any valve, follow proper isolation and safety procedures. Plastic valves are more sensitive to mechanical stress and temperature than metal valves, and improper removal or washing can cause cracks, thread stripping or internal damage.
These safety steps are aligned with:
- OSHA 1910 (General Industry Safety)
- OSHA 1910.147 (Lockout / Tagout)
- NFPA 70 / NEC (Electrical Safety)
- IEC 60529 (Ingress Protection / IP Ratings)
- UL 429 (Electrically Operated Valves)
- De-energize and isolate
- Switch off power to solenoid coils or actuators.
- Follow LOTO procedures to prevent accidental energization.
- Close upstream and downstream isolation valves.
Why: Energized coils may cause shock or burn out when exposed to moisture. Some coils are not IP 65 rated, making water exposure unsafe unless specified under IEC 60529.
- Relieve pressure and drain
- Open a downstream fitting or drain to relieve trapped pressure.
- Ensure temperature and pressure have dropped to safe handling limits.
- Drain as much media as possible from the valve and adjacent pipe sections.
Why: UPVC and PP threads are prone to cracking if pressurized during disassembly.
- Label wiring
- Tag coil or actuator leads so you can reconnect correctly after cleaning.
- Photograph wiring to ensure proper coil orientation and wiring for safe operation.
Why: UL 429 requires proper coil orientation and wiring for safe operations.
- Wear appropriate PPE
- Gloves and eye protection at minimum, plus any PPE required for your process media.
- For chemicals: refer to OSHA 1910 Subpart 1 for glove, apron, and face protection requirements.
- Avoid loose clothing or conductive tools around energized equipment.
Why: Many cleaning agents, even mild acids, can irritate skin or eyes. Some system may contain disinfectants, nutrients, or treated water.
Skipping these steps is how people crack plastic threads, strip fittings, or shock themselves during what should be routine maintenance.
5. Cleaning a plastic solenoid valve, step by step
These steps apply broadly to plastic solenoid valves with PP, POM, or Nylon 66 bodies and EPDM diaphragms, like the ones in the Electricsolenoidvalves plastic valve line.
Always verify against the specific product sheet before disassembly.
Step 1 - Remove the valve from the line if needed
Some cleaning can be done in line, but full cleaning is more reliable when the valve is removed.
- Disconnect the coil or wiring (observe NEC electrical safety)
- Unscrew threaded connections
- Move the valve to a clean bench or tray
Use backup wrenches to avoid stressing the plastic body when unthreading.
Step 2 - Disassemble the wet side
Typical disassembly order: Disassembly order varies slightly by model but generally includes:
- Remove the coil and pilot assembly (if separate)
- Unscrew the top cover from the body
- Lift out the spring, plunger, and diaphragm assembly
- Inspect the orifice, valve cavity, and seat area.
Keep parts in a clean tray so you can see orientation and order.
Engineering notes:
- Typical cover screw torques on Electricsolenoidvalves plastic valves is around 1.5-2.0 N.m
- Over torqueing cause thread stripping or body cracking
- EPDM diaphragms must not be exposed to sharp tools or harsh solvents.
Step 3 - Pre rinse
- Rinse body, diaphragm, and metal parts in clean water to remove loose debris
- Keep water temperature below 40°C to protect UPVC, PP, and EPDM.
Why: UPVC softens above ~50°C as per ASTM D1784; EPDM may deform under excessive heat.
Step 4 - Wash with mild detergent
Note: Use a low strength detergent solution, which is safe for plastics per ASTM D543.
- Mix a small amount of dish detergent with warm water
- Use a soft brush or cloth to clean:
- Orifice area and flow paths
- Diaphragm surfaces
- Plunger tube and stainless components
- Focus on removing sand, rust flakes, and sludge from small passages
Industry guidance supports diluted detergent for rubber and plastic valve components.
Step 5 - Treat light scale if needed
If you see mineral deposits:
- Soak only the scale-affected plastic and metal parts in a diluted vinegar solution (1:3) for a short period
- Start with short soaks, for example, 10 to 20 minutes, rather than overnight soaks used for some generic PVC fittings
- Rinse thoroughly afterward
This approach uses the same basic principle as PVC ball valve cleaning, which often relies on vinegar to dissolve scale, but uses shorter, more conservative soak times to protect EPDM and plastics.
Step 6 - Final rinse and dry
- Rinse all parts with clean water until no detergent or vinegar odor remains
- Air dry or use lint-free towels, and avoid compressed air directly on seals
Step 7 - Inspect before reassembly
Check:
- Diaphragm for swelling, tears, or permanent deformation
- Springs and plunger for corrosion or pitting
- Body and cover for cracks, stripped threads, or warped surfaces
Functional Standards Reference:
- UL 429: plunger must move freely without sticking
- API 598: sealing surfaces must be scratch-free to maintain leak-tightness
Replace any questionable parts. Cleaning cannot fix a compromised diaphragm or valve body.
Step 8 - Reassemble and test
- Reassemble in the same order
- Ensure the diaphragm seats correctly and that the screws are not overtightened (1.5-2.0 N.m is typical).
- Reinstall in line with proper thread sealant.
- Pressurize slowly and check for external leaks
- Re-energize the coil and cycle the valve several times while listening for clean operation. You should hear a crisp click without chatter.
6. Cleaning a UPVC electric ball valve
UPVC motorized ball valves on Electronicsolenoidvalves use a plastic ball and body with an electric actuator mounted on top. Because the actuator contains electronics, cleaning focuses entirely on the valve body, ball, and seats, not the actuator.
The cleaning procedure below is aligned with:
- ASTM F1970 (UPVC valve & seat construction requirements)
- ASTM D1784 (UPVC material limits)
- IEC 60529 (IP ratings for actuators)
- API 598 (seat leak testing philosophy)
- ISA RP75.01 (valve maintenance best practices)
When to clean a UPVC electric ball valve
Typical symptoms indicating maintenance is needed:
- Increasing handle/actuator torque
- Valve does not fully shut off, and minor leakage appears
- You see visible scale or debris in transparent piping or downstream components
- Reduced flow or partial blockage.
Step 1 - Isolate and depressurize
Same safety prep as for solenoid valves. Remove the actuator per the product instructions if necessary so you can access the body and stem.
Step 2 - Flush in place
Often, a simple flush reduces debris:
- Open the valve fully
- Run clean water at moderate flow to sweep out loose material
- If the system design allows, reverse flow briefly to clear pockets
Why: Flow reversal removes deposits from the bottom of the ball cavity.
If leakage or stiffness remains, move to disassembly.
Step 3 - Disassemble the body (only if the design supports it)
For UPVC valves designed to be serviceable:
- Loosen union nuts or body bolts
- Remove the center section containing the ball
- Note the orientation of seats and seals
- Inspect the ball cavity and body for scale or debris.
Step 4 - Clean ball and seats
- Wash the ball, cavity, and seats with a mild detergent solution (<40°C)
- Use a soft cloth or brush
- Avoid scraping or prying with metal tools, which will gouge the plastic
For mineral scale, a short vinegar soak (10-20 minutes) on the ball and body can help, again at conservative strength and time.
Step 5 - Rinse, inspect, reassemble
Use clean water until all detergent and vinegar are removed.
- Rinse until completely clear
- Inspect seats for flat spots, deep scratches, or deformation
- If seats are heavily worn, replacement is a better option than more aggressive cleaning
- Reassemble per product instructions and test for leak-tight shutoff
7. How often should you clean plastic valves
There is no universal cleaning interval for plastic valves because service conditions vary widely. Instead, cleaning interval should be based on:
- Water quality
- Operating environment
- Media type, for example, water vs light chemicals
General industry guidance suggests:
- Inspect and clean internals on a regular schedule
- Weekly in very dirty water or outdoor systems
- Monthly or quarterly in cleaner water and compressed air systems
For typical Electrisolenoidvalves customers using plastic valves in water treatment, hydroponics, or light industrial automation, a reasonable starting point is:
- Quick visual check monthly
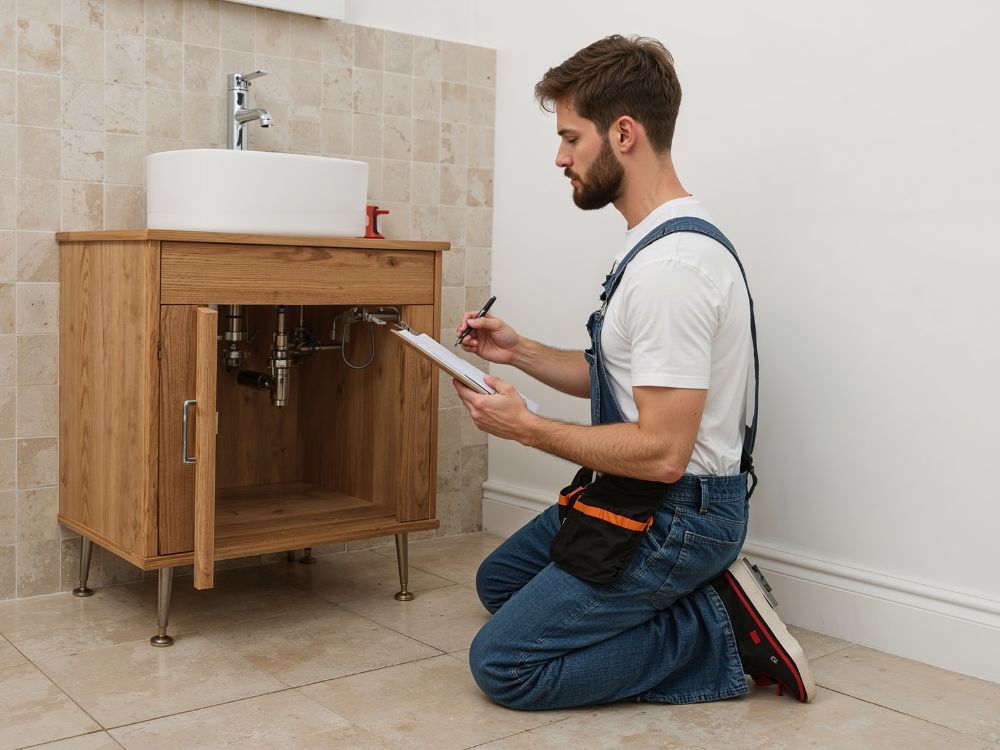
- Internal inspection and cleaning every 6 to 12 months, or sooner if you notice symptoms like chatter, delayed opening, or small leaks
8. Cleaning mistakes that shorten plastic valve life
To actually extend life, avoid these common mistakes:
- Using strong solvents that swell EPDM or soften the plastic body
- Soaking for many hours in concentrated acids or oxidizers without verifying compatibility
- Scrubbing with abrasive pads that scratch sealing surfaces
- Reassembling with misaligned diaphragms or ball seats
- Overtightening plastic threads and cracking the body on reinstall
If you are in doubt, assume the material is less tolerant than a metal valve and choose the gentler cleaning method.
9. When cleaning is not enough
Cleaning is maintenance, not magic. Replace the valve instead of cleaning if:
- The body is cracked, warped, or chemically attacked
- Diaphragms or seats are permanently swollen or brittle
- Coils repeatedly burn out due to contamination-related sticking
- Leakage continues after a careful cleaning and reassembly
In those cases, it is often cheaper and safer to install a new plastic valve, possibly with upstream filtration or a Y strainer to reduce future contamination.
10. Next steps
If you rely on plastic valves for your system, add cleaning to your maintenance calendar instead of waiting for a failure.
Suggested actions:
- Add an internal reminder to inspect plastic valves every 6 to 12 months based on your water quality.
- Use mild detergent and conservative vinegar soaks as your default cleaning toolkit.
- Check any new chemical cleaner against the ESV compatibility database before using it inside a valve.
- If you keep replacing clogged valves, consider adding upstream filtration or a Y strainer to catch debris before it reaches the plastic valve.
Shop our plastic solenoid valve selection for replacements or new builds. Not sure if your cleaning plan is safe for your media? Contact our team at 800-983-8230, and we can help you pick the right valve and maintenance approach.