
Posted by Electric Solenoid Valves on Mar 20th 2026
How to Automate and Remotely Control Valves at Home
How to Automate a Water Valve at Home
Automating a water valve at home lets you control flow with a timer, smart switch, or remote system. In most home setups, the best options are a solenoid valve or an electric ball valve. The right choice depends on your pressure, power source, duty cycle, and whether you need fast on-off control or long-term shutoff.
Automation is now part of everyday life. We control lights, thermostats, and appliances with apps, schedules, and voice commands. Water valve control is a practical extension of that same idea, especially for irrigation, leak response, remote shutoff, and home water management.
Valve automation is the process of controlling valves automatically or remotely to regulate the flow of liquids or gases. Technology that was once limited to industrial systems is now available for home projects, smart home upgrades, and DIY water control setups.
This guide explains common home valve automation methods, compares solenoid valves and electric ball valves, and shows how to approach simple, smart-home, and more advanced sensor-based automation projects.
| BROWSE MOTORIZED BALL VALVES |
Solenoid Valve vs Electric Ball Valve for Home Automation
In most home water automation projects, the real decision comes down to a solenoid valve versus an electric ball valve. Both can automate flow, but they do not behave the same way in service.
| Use Case | Best Option | Reason |
|---|---|---|
| Timed irrigation | Solenoid valve | Fast switching, common for automated watering |
| Remote shutoff | Electric ball valve | Better for longer open or closed positions |
| Leak response | Depends | Choose based on fail-safe behavior and duty cycle |
| Clean water, frequent cycling | Solenoid valve | Quick response |
| Dirty water or debris-prone lines | Electric ball valve | Often more tolerant in these conditions |
A solenoid valve is often the stronger choice when you need fast electrical response, regular cycling, or integration with timers and controllers. An electric ball valve is often a better choice when you need remote shutoff and want the valve to remain open or closed for longer periods without constant cycling.
Why Automate Valves at Home?
There are several practical reasons to automate a valve at home:
- Convenience: Control valves from a phone, smart switch, or voice assistant without manual shutoff.
- Efficiency: Automate watering and scheduled water use to reduce waste.
- Safety: Shut off flow automatically during leaks or overflow events.
- Comfort: Improve control in heating, cooling, and water-handling systems.
- Smart home integration: Connect valve control with your wider home automation system.
Whether you are building a smart irrigation setup, automating a greenhouse, or adding remote shutoff to a utility line, valve automation can add real value.
| BROWSE SOLENOID VALVES |
| BROWSE ELECTRIC BALL VALVES |
Valve Automation Basics
Before choosing a control method, it helps to understand the basic parts of an automated valve system and how different valve types behave.
Types of Valves for Automation
Several types of valves can be automated, each with different strengths:
- Electric Ball Valves - Good for remote shutoff and quarter-turn isolation.
- Solenoid Valves - Electrically operated valves commonly used for automatic control.
- Butterfly valves - More common in larger line sizes and broader flow control applications.
- Globe valves - Better suited to throttling and flow regulation than simple shutoff.
The best valve depends on the application, required flow, operating pressure, fluid condition, and control method.
Basic Components of an Automated Valve System
An automated valve system typically includes:
- Valve: The device that opens, closes, or regulates flow.
- Controller: The device or logic that sends the open or close signal.
- Power source: Outlet power, battery power, or another compatible supply.
- Communication module: Wi-Fi, Bluetooth, or another method for remote access when needed.
Overview of Control Methods
Valve automation systems can be controlled by:
- Timers: For simple schedules.
- Sensors: For moisture, flow, level, temperature, or pressure response.
- Remote control: Through a smartphone app or web interface.
- Voice commands: Through a smart home assistant.
- Programmable logic: More advanced automation based on multiple inputs and conditions.
Simple Valve Automation Solutions
The easiest way to start is with simple devices such as plug-in timers and smart plugs. These options are practical for homeowners who want basic automation without a more advanced control system.
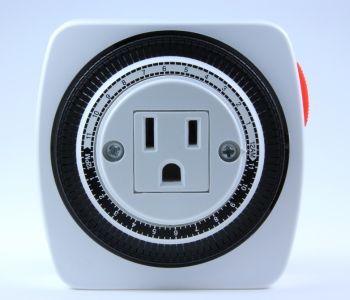
Basic Plug-in Timer
A plug-in timer connects to a standard outlet and switches power on and off based on your programmed schedule.
Common uses:
- Automated garden watering
- Timed filling of water features
Pros: Easy to install, affordable, reliable, and does not require internet access.
Cons: Limited logic, no remote control, and not ideal for more complex automation.
Basic setup instructions:
- Plug the timer into a standard electrical outlet.
- Connect the valve power supply to the timer.
- Set the desired on and off schedule.
- Test the system before regular use.
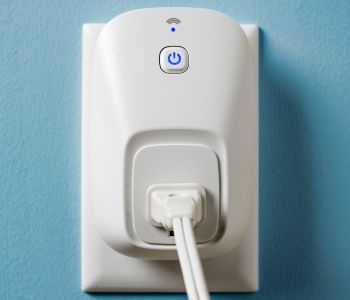
Smart Plugs and Switches
Smart plugs and switches add remote control, app access, and smart-home compatibility. They are often used when homeowners want more flexible scheduling and control from anywhere.
Common uses:
- Remote irrigation control
- Scheduled water feature activation
- Automated filling or shutoff tasks
Pros: Remote access, flexible scheduling, smart-home compatibility.
Cons: Requires Wi-Fi, may cost more than basic timers, and setup can be more technical.
Basic setup instructions:
- Plug the smart plug or switch into a standard outlet.
- Connect the valve power supply or control device.
- Install the manufacturer's app and connect the device to Wi-Fi.
- Set schedules or control the valve through the app or voice assistant.
Smart Home Integration
Smart home integration takes valve automation beyond simple schedules. It allows the valve to coordinate with sensors, hubs, assistants, and other connected devices.
Smart Home Hubs
Smart home hubs such as Amazon Echo, Google Nest Hub, Apple HomePod, or SmartThings can serve as the central control point for compatible devices. In a valve automation setup, that means you may be able to coordinate watering, shutoff, or alerts through one interface.

Common uses:
- Coordinating valve control with weather or leak sensors
- Centralizing control of multiple devices
- Combining valve control with lights, alarms, or notifications
Pros: Centralized control, broader automation options, better smart-home coordination.
Cons: More complex setup, compatibility limits, and added cost.
Voice-Controlled Valves
Voice assistants such as Amazon Alexa, Google Assistant, or Siri can add hands-free control when the valve control device is compatible with your smart home system.

Common uses:
- Hands-free control of irrigation or utility water lines
- Quick shutoff during an emergency
Pros: Convenience, accessibility, and quick manual override through voice commands.
Cons: Requires compatible hardware, reliable connectivity, and acceptance of normal smart-speaker privacy tradeoffs.
Advanced Valve Automation
Advanced automation is better suited to users who want custom logic, sensor-based response, and more control than off-the-shelf timers or plugs can provide.
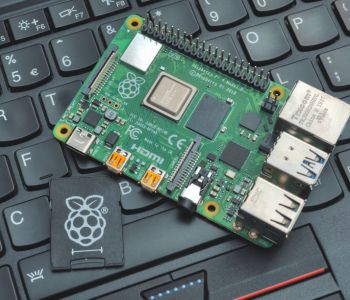
DIY Microcontroller Projects - Arduino or Raspberry Pi
Arduino, Raspberry Pi, and similar controller platforms are popular for DIY valve automation. These systems can read sensor inputs, trigger relays, and run custom automation logic for more advanced projects.
Common uses:
- Custom irrigation systems
- Leak detection and automatic shutoff
- Hydroponics and greenhouse control
- Personalized water management projects
Pros: Highly customizable, expandable, and cost-effective for complex systems.
Cons: Requires programming knowledge, electronics familiarity, and more setup time.
Examples of platforms:
- Arduino Uno
- Raspberry Pi 4
- ESP32 development board
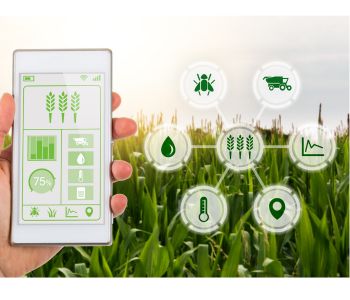
Sensor-Based Automation
Sensor-based automation uses real-time inputs to control valves automatically. This can make a system more responsive and more useful than a simple schedule alone.
Common sensor types:
- Moisture sensors: Often used in irrigation control.
- Flow sensors: Used for leak monitoring or water usage tracking.
- Level sensors: Used for tanks, pools, or containers.
- Temperature sensors: Useful in heating and cooling applications.
- Pressure sensors: Used for safety shutoff or pressure-based control logic.
- Motion sensors: Used in specialized automation scenarios.
Typical integration steps:
- Choose the appropriate sensors for the application.
- Connect sensors to the controller or automation platform.
- Set the automation logic that responds to sensor readings.
- Test and calibrate the system.
Common uses:
- Automated smart garden watering
- Water level management in tanks and pools
- Temperature-based control systems
- Pressure-based shutoff logic
- Motion-triggered water features
Choosing the Right Solution
There is no single best method for every home valve automation project. The right solution depends on how often the valve cycles, what controls it, what fluid it sees, and what happens when power is lost.

In general:
- Choose a solenoid valve for fast switching, timer-based control, and frequent cycling.
- Choose an electric ball valve for remote shutoff and longer open or closed dwell times.
- Choose a simple timer or smart plug control when you want a lower-cost starting point.
- Choose sensor-based or microcontroller-based logic when your automation needs to react to real conditions.
This decision path is especially important in home water applications because pressure, debris, and duty cycle can quickly determine whether a setup works well or becomes unreliable.
DIY Valve Automation Projects at Home
Basic Setup: Automated Garden Watering
A simple irrigation project is one of the most practical ways to automate a water valve at home.
Typical materials:
- Normally Closed Solenoid Valve
- Timer
- Drip irrigation tubing and emitters
- Pressure regulator if needed
- Adapters and fittings as required
Basic setup steps:
- Install the solenoid valve in the water supply line with the correct fittings.
- Connect the timer to the appropriate power supply.
- Wire the valve according to the manufacturer's instructions.
- Run the drip irrigation system to the watering area.
- Program the timer and test operation before full use.
Advanced Setup: Fully Automated Greenhouse Control System
A more advanced greenhouse system may use microcontrollers, sensors, relays, and automated irrigation components to maintain growing conditions automatically.
Typical materials:
- Microcontroller such as Arduino Mega or Raspberry Pi 4
- Temperature and humidity sensors
- Light sensors
- Electric ball valves for irrigation control
- Fans, heaters, grow lights, and relay modules
- Power supplies, enclosure, and wiring
Typical setup steps:
- Install sensors throughout the greenhouse.
- Mount and configure the controller in a protected enclosure.
- Wire relay modules, valves, lights, and environmental devices.
- Program the control logic for temperature, humidity, light, and watering response.
- Test, calibrate, and fine-tune the system over time.
Ready to Take the Next Step?
Home valve automation can be as simple as a timer-based irrigation setup or as advanced as a sensor-driven greenhouse control system. The best approach depends on the application, how much control you need, and whether a solenoid valve or an electric ball valve better fits the job.
Need help choosing the right solution? Our team offers guidance on valve types, voltage, and pressure compatibility, and control methods.
You can call us at 800-983-8230 between 9:00 AM - 5:00 PM (EST) or email us anytime at sales@electricsolenoidvalves.com.
Related Products:
- Normally Closed Solenoid Valves - Best for automated shutoff, timer-based watering, and fail-closed water control applications.
- Motorized Ball Valves - Good fit for remote shutoff, longer open or closed dwell times, and quarter-turn water isolation.